Playing Sound Effects in Unity
Playing a sound in Unity is relatively easy. You only need an Audio Source component to play the audio clip and an Audio Listener component to hear the audio. Essentially the Audio Source is a speaker playing the sound, and the Audio Listener is the ears of the game that hear the sound. After giving a brief rundown of each component, I will show how to use them to create sound effects for the Space Shooter from previous articles.

The Components
Here is a brief overview of each component before we put them to work in the game.
Audio Listener
The Audio Listener component is already applied to the Main Camera and is already on any Camera created by default. The Audio Listener component does not have any settings that you can alter. Typically, the Audio Listener is on the Main Camera, but it may be better to have it on the Player, depending on the game.

Unity can only handle one Audio Listener active in the scene at a time and will give you a warning when there is more than one active when in Play Mode.

Audio Source
An Audio Source component has to be added to a GameObject. The Audio Source component has many settings; most are pretty self-explanatory as to what they do. I will list a few that we will need for this article. For a complete description of each property, see the Unity Documentation.

Audio Clip: Reference to the sound clip file that will be played.
Play On Awake: If enabled, the sound will start playing the moment the scene launches. If disabled, you need to start it using the Play() command from scripting.
Loop: Enable this to make the Audio Clip loop when it reaches the end.
Priority: Determines the priority of this audio source among all the ones that coexist in the scene. (Priority: 0 = most important. 256 = least important. Default = 128.). Use 0 for music tracks to avoid it getting occasionally swapped out.
Volume: How loud the sound is at a distance of one world unit (one meter) from the Audio Listener.
How to Use the Components
We will add background music, a laser-firing sound, explosion sounds, and a power-up sound to show how to use the components.
Background Music
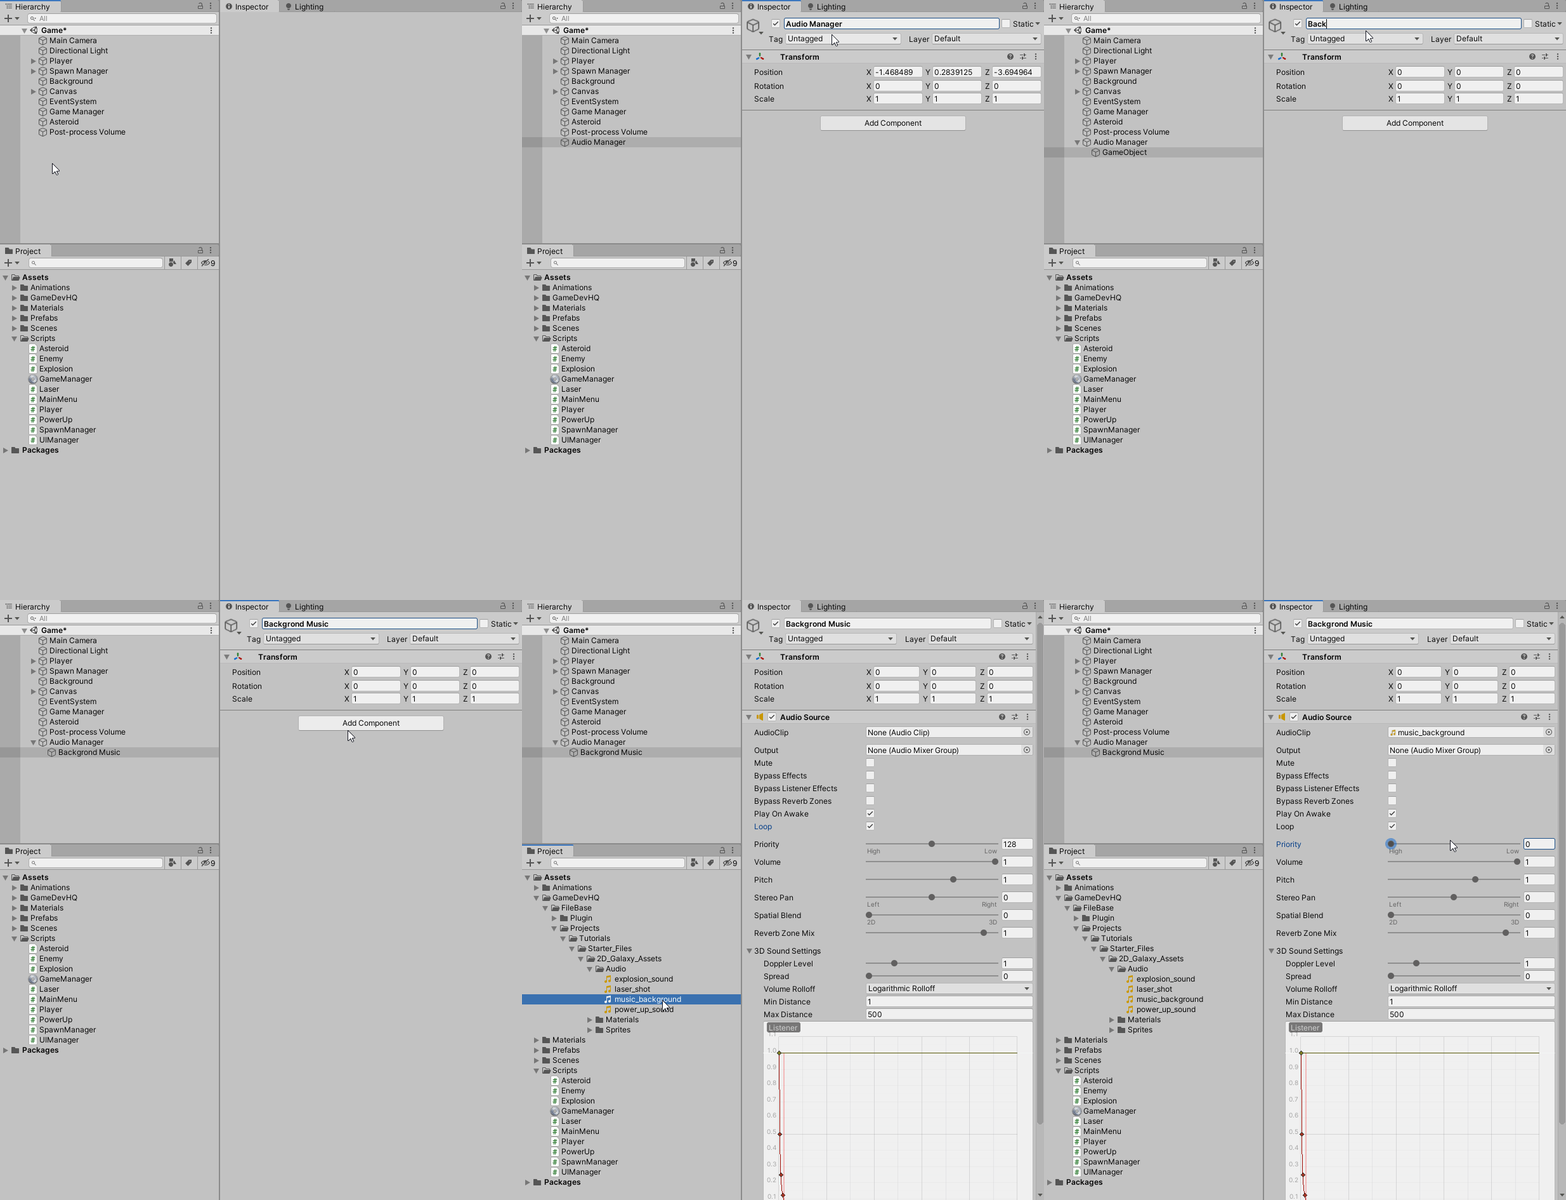
The easiest thing to create is looping background music. All that is need is a GameObject with an Audio Source component set to Loop and an Audio Clip that you want to be played.
Create an Empty GameObject named “Audio Manager” to keep the Hierarchy organized for adding more sound effects later, zero out the position. Add an Audio Source component, enable Loop, and drag in the audio clip you want to play into the Audio Clip field. Now in Play Mode, the music_background audio clip will start playing and loop when finished.

Note: If you want to create an Audio Source just for one Audio Clip that you have in the Assets folder, you can just drag that clip to the scene view — a GameObject with an Audio Source component will be created automatically for it. Dragging a clip onto an existing GameObject will attach the clip along with a new Audio Source if there isn’t one already there. If the object already has an Audio Source, then the newly dragged clip will replace the one that the source currently uses.
Laser Shot
In the Player script, add a private variable of type AudioClip named “_laserClip” with a null value; this is a reference for the sound effect that will play. Then create a private variable of type AudioSource named “_source” with a null value; this is a reference to the Audio Source component on the Player that is told to play the laser sound.

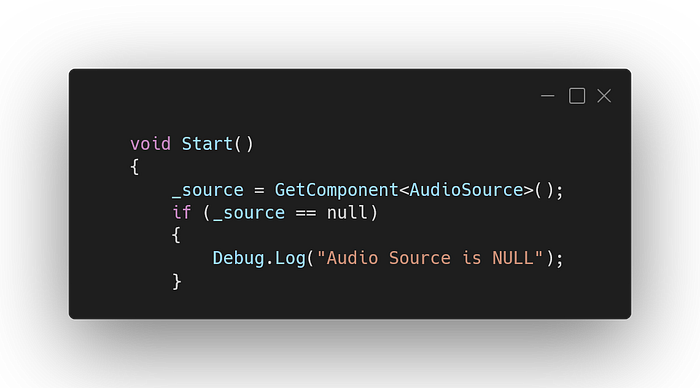
In Start, retrieve the Audio Source component from the Player and assign it to _source, then null check _source and if it is not null change the clip of _source to _laserClip; this will set the audio clip in _laserClip to the Audio Source through code.

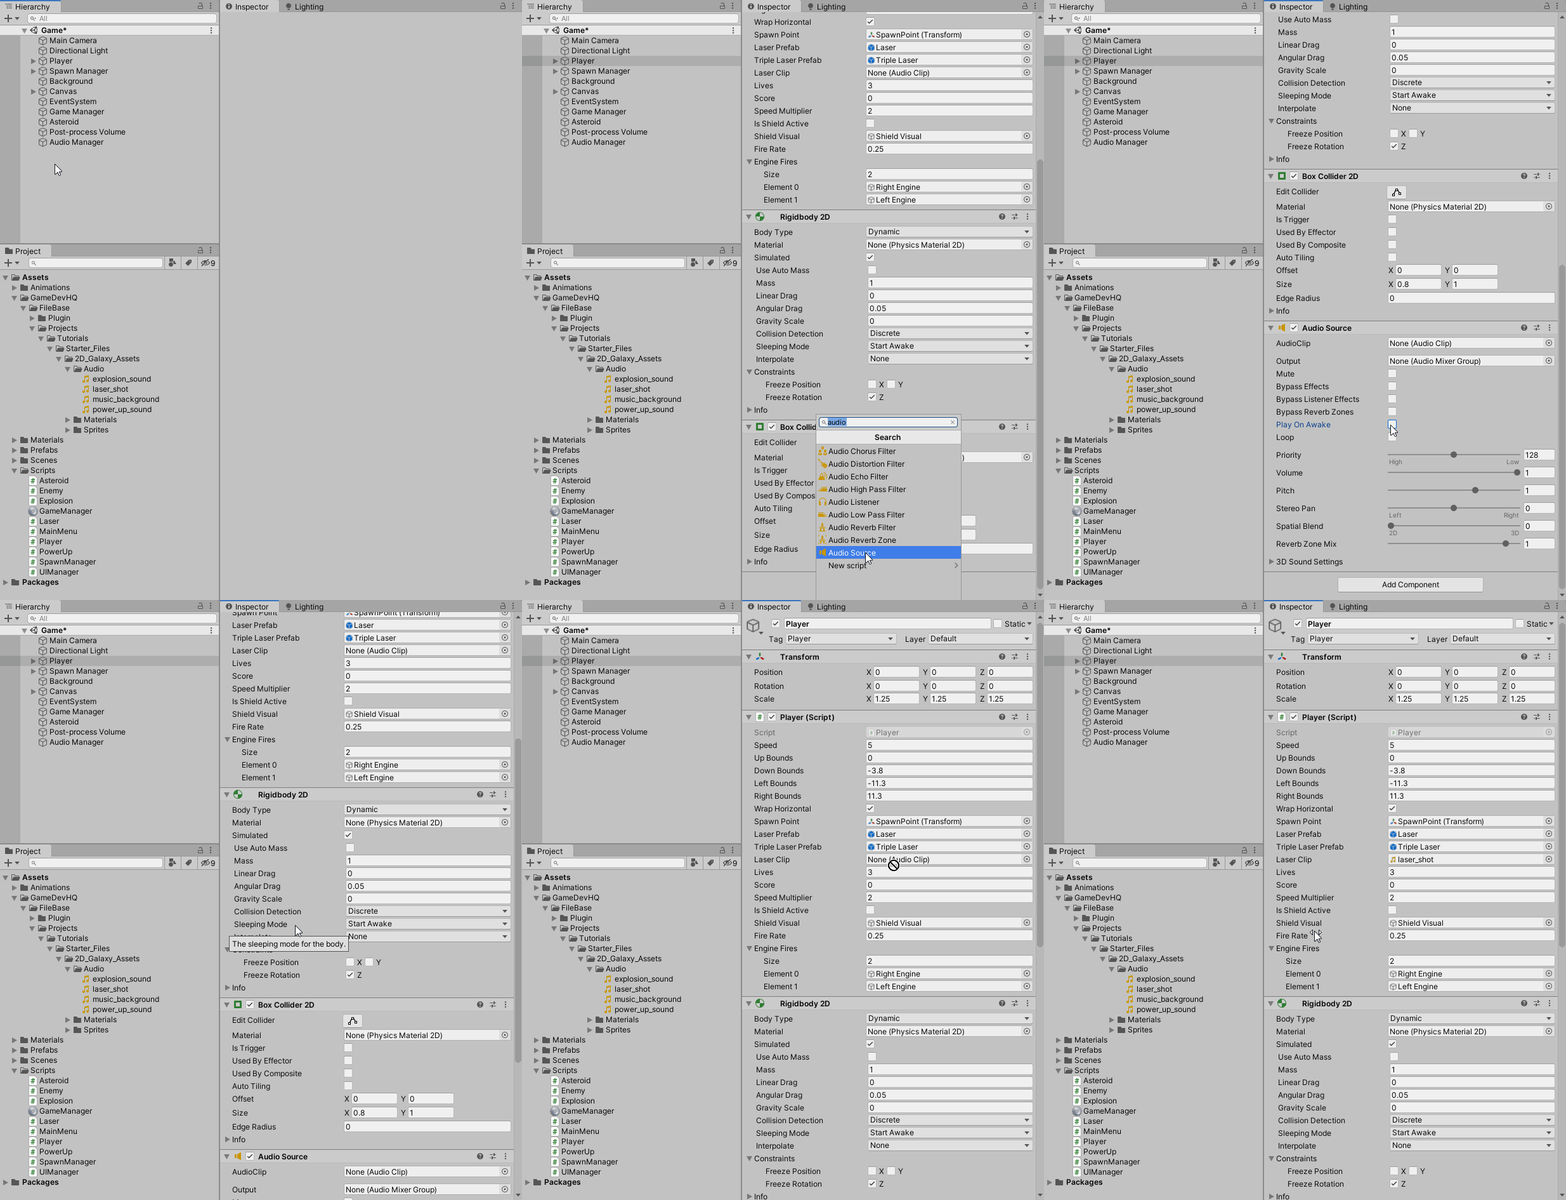
Add the Audio Source component to the Player GameObject, disable Play On Awake, and drag in the audio clip for the laser shot into the Player script Laser Clip field. Now the Player will play the laser sound effect every time a Laser is fired.

If you enter Play Mode, you can see that the Laser Clip field’s audio clip gets assigned to the AudioClip field of the Audio Source by the Player script. Now to get the sound effect to play when you fire a Laser.

Back in the Player script, inside the FireLaser method, add _source.Play(); this will tell the Audio Source to play the sound in its AudioClip variable. Now the laser shot sound will play every time the Player fires a Laser.

Before moving on to the Explosion sound effects, let’s make the Player’s Audio Source a little more modular.
In the Player script, remove the else statement where the _source.clip is changed.

Then create a new public method named “PlayClip” and pass in a variable of type AudioClip called “clip”; this will allow you to play any sound you pass in. Inside the method, tell _source to play the sound passed-in by using PlayOneShot(clip). That will play the passed-in clip once using the Audio Source’s settings, but unlike the Play function, the PlayOneShot function does not cancel clips that PlayOneShot or Play is already playing.

Finally, change the _source.Play() out with PlayClip(_laserClip); this will call the PlayClip method and play _laserClip with the PlayOneTime function.

Explosions
Now to add explosion sounds to the Asteroid and Enemy when destroyed.
First, let’s add the Asteroid explosion. Adding the explosion sound is very simple since we already instantiate an Explosion Prefab when the Asteroid is destroyed. We can just add an Audio Source component to the Explosion Prefab, drag in the audio clip for the explosion, and have it Play On Awake. With that, the Asteroid now has a sound effect when destroyed. Now, time for the Enemy explosion.

Next in the Enemy script, add a private AudioClip named “_explosionClip” with a null value; to hold the explosion sound. Now, create a private AudioSource called “_source” with a null value; to contain a reference to the Audio Source component on the Enemy Prefab. Then create a private bool named “_isDead” with a false value; we will use it to ensure the Player can’t trigger the explosion sound more than once.

In Start, retrieve the Audio Source component from the Enemy and assign it to _source, then null check _source and if it is not null change the clip of _source to _explosionClip; this will change the audio clip to the explosion sound effect.

In OnTriggerEnter2D, inside the if statements checking the tag, add an if statement that checks if _isDead is false and if so, have _source play the audio clip and set _isDead to true, so it doesn’t play again if collided with again.

Add the Audio Source component to the Enemy Prefab, disable Play On Awake, and drag the audio clip for the explosion into the Enemy script’s Explosion Clip field. Now the Enemy will play an explosion sound effect once it dies from either Laser or Player collision.

PowerUp
The PowerUp creates an interesting problem since it is destroyed on contact with the Player and does not instantiate anything. There are multiple ways to handle this; I will show two.
In the PowerUp script, add a private AudioClip named “_powerUpClip” with a null value; there is only an audio clip because the PowerUp gets destroyed right away, so there is no reason to have an Audio Source.

The first way of handling this problem is to create a new GameObject with an Audio Source on it to play the clip and then destroy itself when the clip is complete. Luckily Unity has a function for this already in the AudioSource class called PlayClipAtPoint, which takes in an audio clip to play and a Vector3 for a position for it to create the GameObject. After the clip has finished, it destroys itself.
In the OnTriggerEnter2D, before the PowerUp is destroyed add AudioScource.PlayClipAtPoint( _powerUpClip, transform.position); this will call the PlayClipAtPoint function in the AudioSource class and pass it the _powerUpClip to play at the PowerUp’s position.

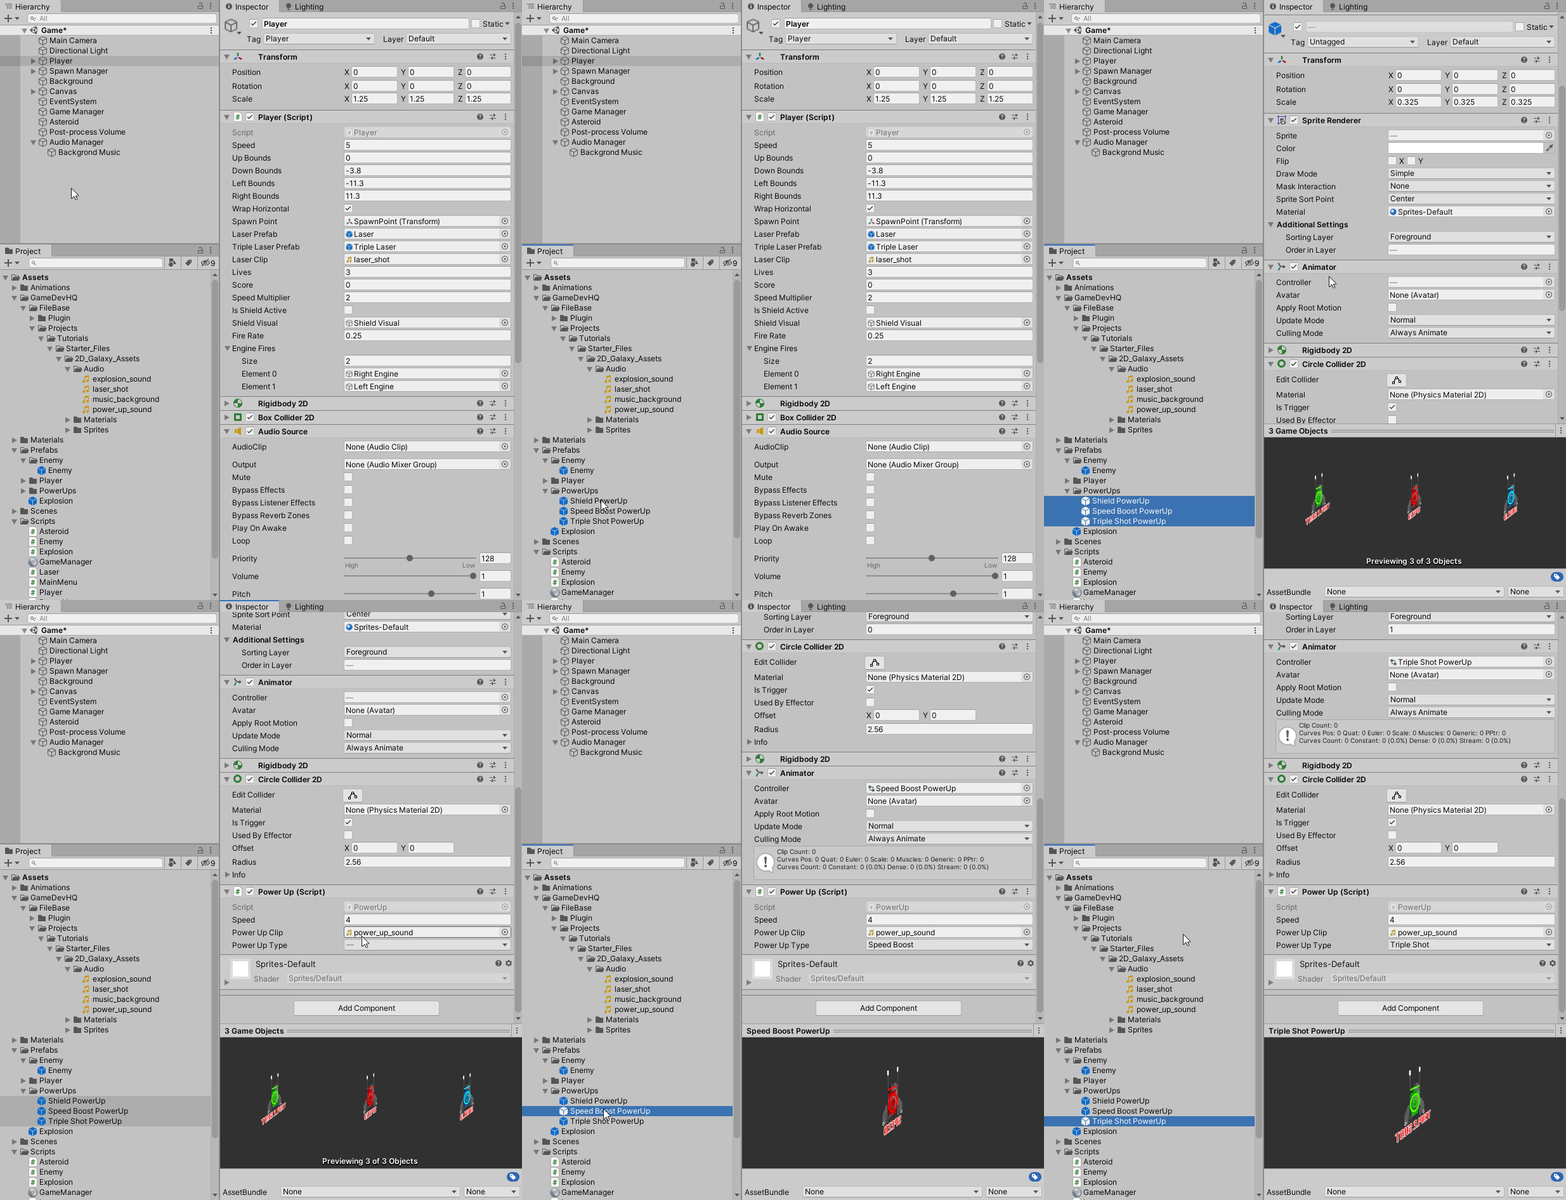
Select all the PowerUp Prefabs at once, then drag in the audio clip for the power-up sound into the PowerUp script Power Up Clip field, and this will apply to all of them at once since they all have the same script and variable field.

Now it is working like a charm. The only problem with the GameObject creation method is that it can clutter the Hierarchy if a lot of them get called in a short time.

The second way of handling the problem is to use the Player script’s PlayClip method. Since we are already getting a reference to Player for the PowerUp activation, it will be easy to use PlayClip and pass in the _powerUpClip for it to play.
In the OnTriggerEnter2D, inside the player null check, call the PlayClip method on the player and pass in _powerUpClip. That will send the _powerUpClip to be played by the PlayClip method using PlayOneShot on the Player’s Audio Source. As mentioned above, the PlayOneShot function does not cancel clips that are already being played, so the power-up sound will not interrupt the laser sound or vice versa.

With that, the game now has sound and feels so much more interactive because of it. In the following article, we will look into building the game into a stand-alone application.

